

Graphic Overrides, added in ARCHICAD 20, are to me one of the most important game changers on the use of Archicad. They just make total sense in the way you think and develop your AC model. The way you plan the outcome of your model, whether is a 3D diagram, a floor plan or an internal elevation.
Prior to them, the templates had to planned carefully to be able to control precisely the graphics and the drawings produced, and ARCHICAD was just great doing it! You had plenty of control but the downside was that you had to have a very clear mental picture of how the different attributes (pens, colours, fills, surfaces…) will interact with each other and with the modelled geometry. Some people felt constrained by that.
Graphic Overrides, just simplify this process extremely. Many people are discovering this, writing about it and showing the great power of using them. We also have some great articles about its use like this one showing how to create beautiful plans or elevations using them. But today I am here to talk about how Graphic Overrides can help as part of the modelling workflow and not as part of the outcome.
Auditing your model.
What does “Auditing” mean and why is important.
First time I heard about audit an ArchiCAD model was last summer in the Graphisoft Global KCC in Budapest. Nathan Hildebrandt from skewed gave us a lecture on this.
Graphic Overrides had been just announced and I believe he mentioned them, but focused his speech on the previous auditing methods: Using Building materials (another great companion) together with interactive schedules, he was able to see whether his models were correct and where the mistakes or the lack of information could hide.
The beauty of BIM as we all know is that enable you to truly multitask, perfectly explained by Shoegnome in this article: “Never do just one thing”. Work on plans, elevations, sections, 3D, schedules… all at the same time gives you max speed and productivity while minimising the errors. But that complexity also leads sometimes to some mistakes or omissions that can be easily resolved and quickly amended. But only if you can find them.
According to the Wikipedia:
“Audit is an evaluation of an organisation, system, process, project or product, in particular.”
“An audit is a systematic and independent examination… Audits provide third party assurance to various stakeholders that the subject matter is free from material misstatement”
“A project audit provides an opportunity to uncover issues, concerns and challenges encountered during the project lifecycle…”
This little research on the etymology of the word reveals that, for our purpose, an audit is a little investigation on our own model to discover where is our workflow breaking. Where the information and the non-geometrical properties that we are using for scheduling, exporting data to other software or getting all the views right and automated, is located.
Case Study

Ok, I’m trying to keep it abstract for now and maybe you are not seeing the purpose of this. So I’m going to quickly share a very recent example of what I’m talking about.
One of latest projects was two residential blocks in Dubai collaborating with Tasmeem the local design studio. For the design presentation, we had to prepare individual floor plans of the typologies as well as area schedules of them. Then a full BIMx model will be submitted also for the presentation.
We made use of two “custom properties” to categorise the zones of different apartments by typology, from Type 1 to 15 (bedrooms, living room, bathroom, kitchen…. of each type). And a second property to separate the ones that were repeated (A, B, C…) due to the symmetry of the block.
This second property will give you the opportunity to choose just one apartment from the ones that are repeated. Apartment TYPE 1 may have 1A, 1B, 1C… but for the diagram, we only want to list the area of one of each kind, therefore we have to specify this on the schedule settings.
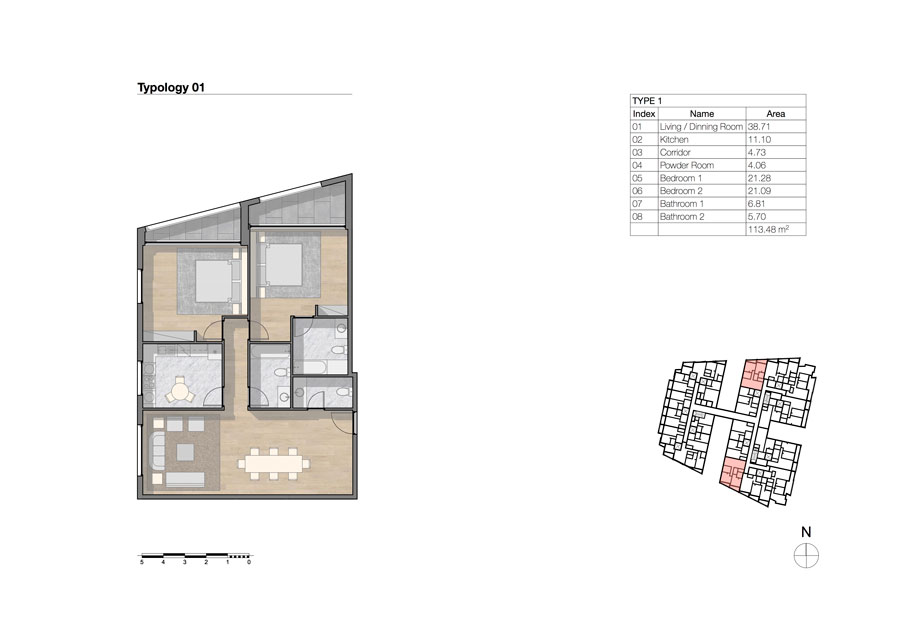
This is the final result.
Sounds easy, doesn’t it?
Type 1-A, Type 1-B, Type 2-A, Type 2-B… and so on.
Then we programmed the different area schedules to list only each type, just once.
The issue is that due the number of different typologies, that some of them were in pairs and some not, various stories… it was very easy to mistake and apply the property to the wrong apartment or to forget one, or even sometimes just because I was using the eyedropper and syringe to copy zone parameters, accidentally was injecting the wrong property to the zones as well…
Graphic Auditing
At some point, after working on all these zones for a bit, I was lost. My area schedules were displaying a wrong amount of areas and I couldn’t know which one had all the correct set of properties and which ones were empty or mistaken. Then I remembered Nathan and “the auditing theory”.

“Not yet set” Property will display which apartments haven’t been filled with the correct property.
By using Graphic Overrides I set up a rule to display in different colours in plan the 15 different typologies in the plan view. So I had a quick visual feedback of which ones were filled with the “Type Property”.

Creation of the “Type number” Override rule.

“Type” Property Map

Creation of the Graphic Override Rule.

A /B Override gives you a map of how the property is applied throughout the model.
Final conclusion.
Without this workflow, going one by one, checking the zones, trying to spot the mistakes… would have been a nightmare. Another possible workflow would have been, setting up a schedule listing those properties in order to check them, but without the visual feedback, would have been quite difficult as well, if not impossible.
This little workflow not only gave me speed but also saved me from mistaken the areas, which was one of the most important points of the exercise.
The purpose of using Graphic Overrides together with Custom Properties here is not to be seen or presented, is just a custom tool that you create for yourself at some point of a process to avoid problems, give you speed…etc.
Once understood the logic of the system (how your model is supposed to behave) you can quickly set up this rules and properties and save yourself some time and headaches.
Hope this article has been useful and don’t be afraid to use this technique for any purpose you can think of.
Share with us if you have any question or idea that may even improve it. And enjoy the override!