Today we’re going to do a very quick exercise to create custom surfaces and materials in ARCHICAD and CineRender, the new render engine included in ARCHICAD since version 18.
This render engine comes from CINEMA 4D, a very powerful 3D modeling, animation and rendering application developed by MAXON Computer.
In my opinion the 2 features of this new render engine that have made ARCHICAD become a serious player in the field of Architectural Visualisation are the Global Illumination and the surface layer system.
Before version 18 surfaces used to be composed by a single layer providing the colour information (the image of the material for example a wood texture or a tile) and you could apply some other properties for the texture as reflection, luminance, alpha… but the control of all this other properties was very limited and very simple.
Mainly because of that, the most usual way to get profesional renders was, once finished the AC model, export the file to another rendering software. Cinema 4D, 3Dmax, Artlantis, Octane render among others, have great connection already with AC.

.
New textures inside CineRender work with a layer system, called usually “channels” that are used to build the textures in the profesional software packages. This “channels” are just a more sophisticated way to use those old properties as reflection, refraction, bump, displacement, alpha…
The more channels a texture has, the better it usually looks. Those channels describe the physical properties of the materials and can be developed so much and in such a complex way that some people live out of doing and selling this textures.
This packages can be found in many internet stores and most of the times have the particular formats of the different softwares but one good thing is that usually also contain the different image layers independently.
Some websites offer free downloads of this textures, or libraries of free textures shared by the user community. One of this websites is this the MAXWELL Resources Site, they offer a library of FREE shared textures created by the users world wide, with generally great quality.
.

What kind of channels do you have to look for?
Depending on the kind of the texture you’re creating, there are different channels that you but in general the basics for the material creation are the colour channel, a bump and a reflection channel. For transparent materials a refraction and Alpha channel are common too.
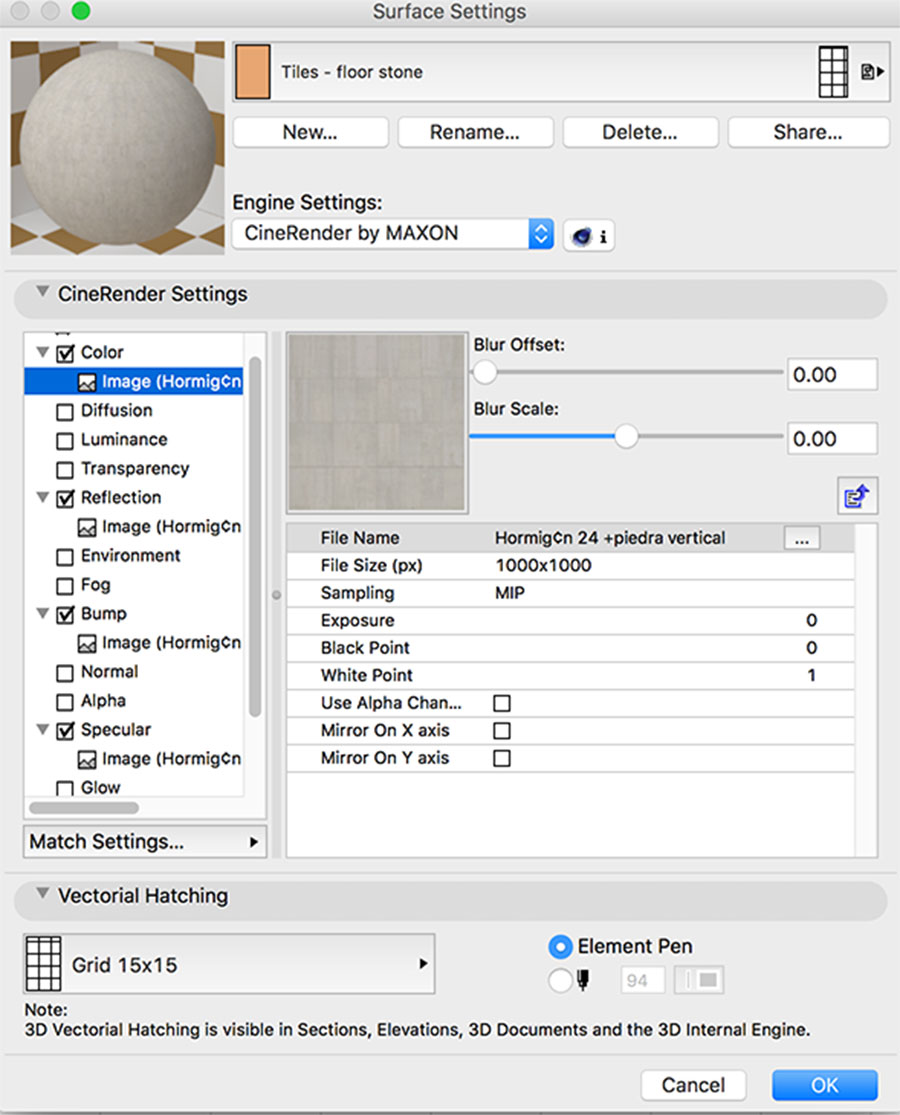
After downloading the layers we go to ARCHICAD and open the surface attribute window. There we go to “NEW” and in this case we go to duplicate one. We will change the name and probably everything inside the material, but anyway I like to chose a similar material because sometimes might have any internal setup that can be useful to help us with the new material.

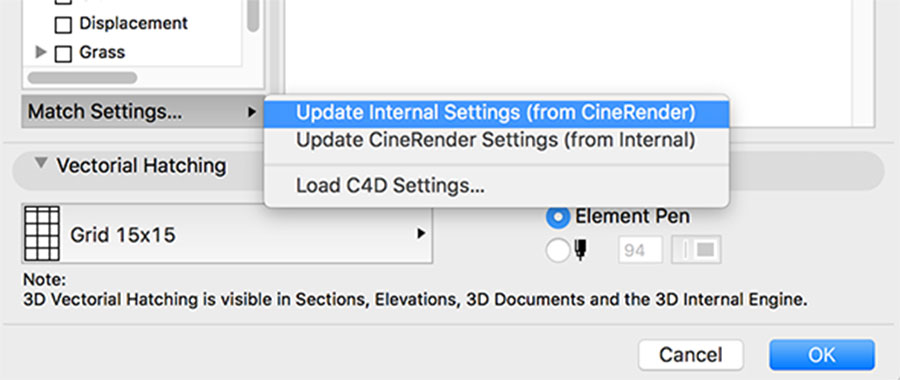
Next important thing we need to know is the difference between the render engines. The internal render engine controls the display of the materials in the 3D view. The CineRender does it for the rendered images. We will create the new material textures in the CineRender engine and when the setup is finished we will make it match with the internal engine, in order to preview the changes in the AC window.
We see that by default the old material had some channels activated and some images preloaded.
How can you recognise the different kind of layers?
The images composing the channels are very similar to each other but there are some simple rules. The color channel is normally a picture of the material. The bump channel is always a black and white version of it (Bump “reacts” just to grayscale values). Bump gives you the illusion of relieve, without actually changing the geometry of the surface. And reflection channel also works with grayscale values. In the case of reflection, black means “no reflective” and white “reflective”. Normal channel (which is a advance version of the bump channel) is generally blueish.

The folder we got have three layers. We can identify them also by the name. Although the material name is written in spanish, the name has the suffix “bump” and “spec”, corresponding to the bump layer and the specular.

Lets clean up the old layers, going into the different channels and substituting the images in every channel for our downloaded images. Clicking under the texture type (in our case says “layer” but could be different), it will appear a list of texture types. Select “image” and will pop up a dialog window to select the image location. If you don’t have it inside the file library, as our case now, search it in your computer using the “file dialog box”.

Once selected you will see the texture preview changing to the new image selected. Lets proceed doing the same with the other two channels.

The final adjust is the texture size. That depends on how the image is done. The image file we have is square and we can count 8 tiles horizontally. Supposing the tiles 0.3m wide (that’s a designers choice) we can set the image size to be 2.4m wide.

We are ready to go! Just one more step, as I mentioned above, in order to visualise the changes on the 3d window inside ARCHICAD we need to match the settings of the material in the internal render engine.


