SIMPLIFY AND AUTOMATE A WORKFLOW TO SAVE TIME: GRAPHIC OVERRIDES + 3D DOCUMENTATION
Hello everyone,
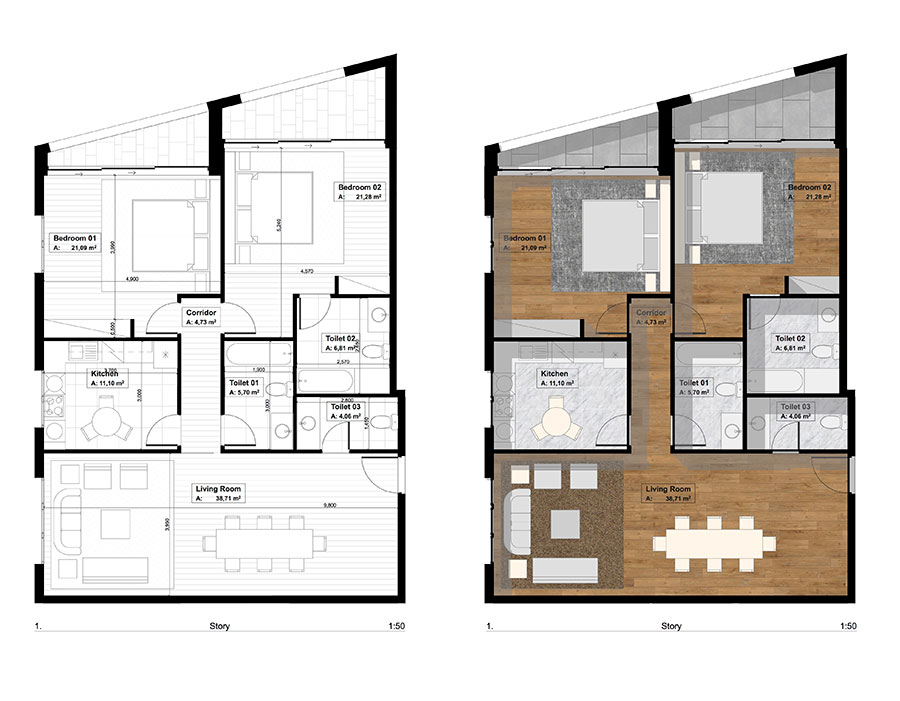
ARCHICAD has a great potential when it comes to produce documentation. In all the posts about this topic we like to show different kind of documents that we can produce depending in our necessities. In this exercise that we are currently working on we needed to combine some simple layouts with Render Floor Plans to help our clients to understand the space of the project we are working on. This is not the type of documentations we usually like to produce but we must admit that for some eyes could be very useful.
The main advantage of this process is that everything is automated and you no need to make a render out of the model. The typical way of producing this images is by doing a render that you will later will combine with line drawings or export a Pdf that later you will open in photoshop and work on it. We think is better to have this whole process inside ARCHICAD.
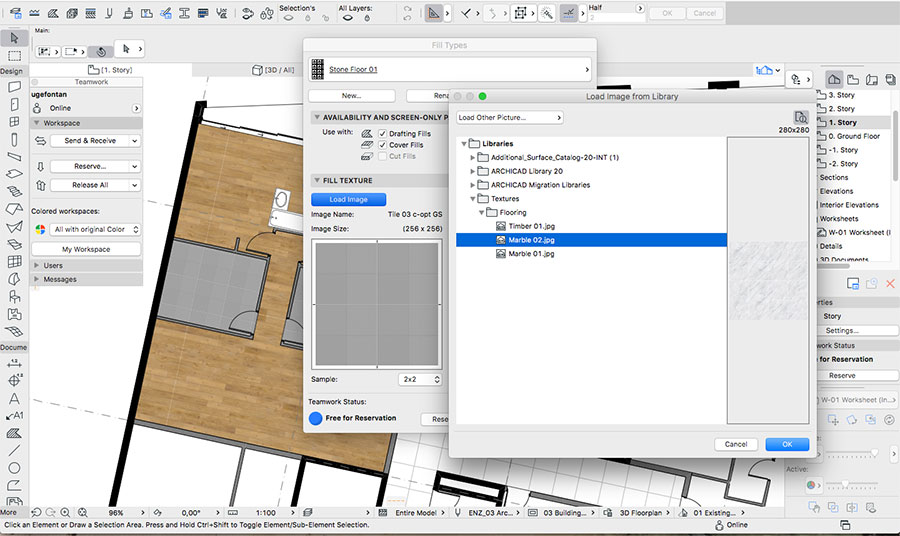
1 First you need to choose the textures, images and other Jpg files you want to use for your the materials and textures of your documents.
2 Then we will input this material into our Library to be used in our file.

3 We create Image Fills in ARCHICAD using the Images we imported previously.
4 Then with the Graphic Overrides we will make our elements in the floor plan to display the Fills we just created.

5 To add the shadows we first create a 3D document of a Top view of an Axonometry with shadows.
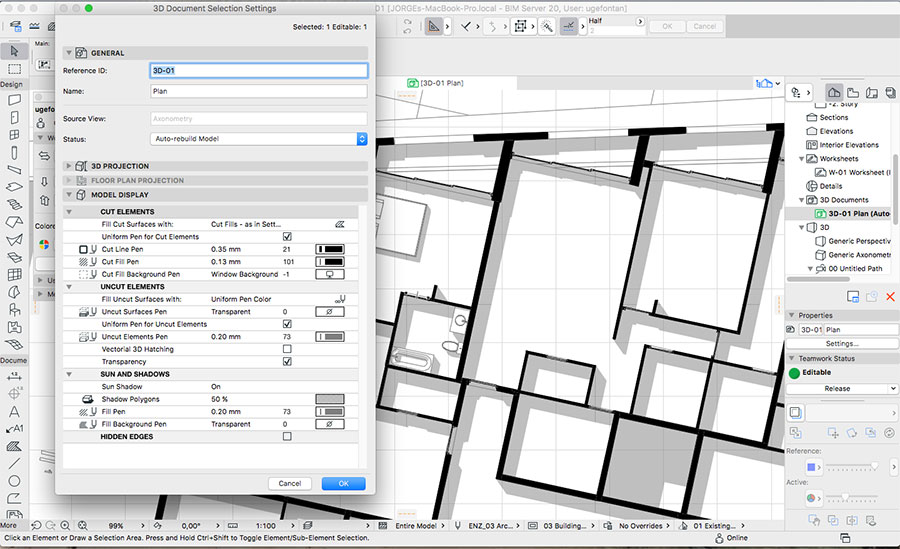
6 In our Layout we combine a view port of the Floor plan with a view port of the 3D Document, both at the same scale.
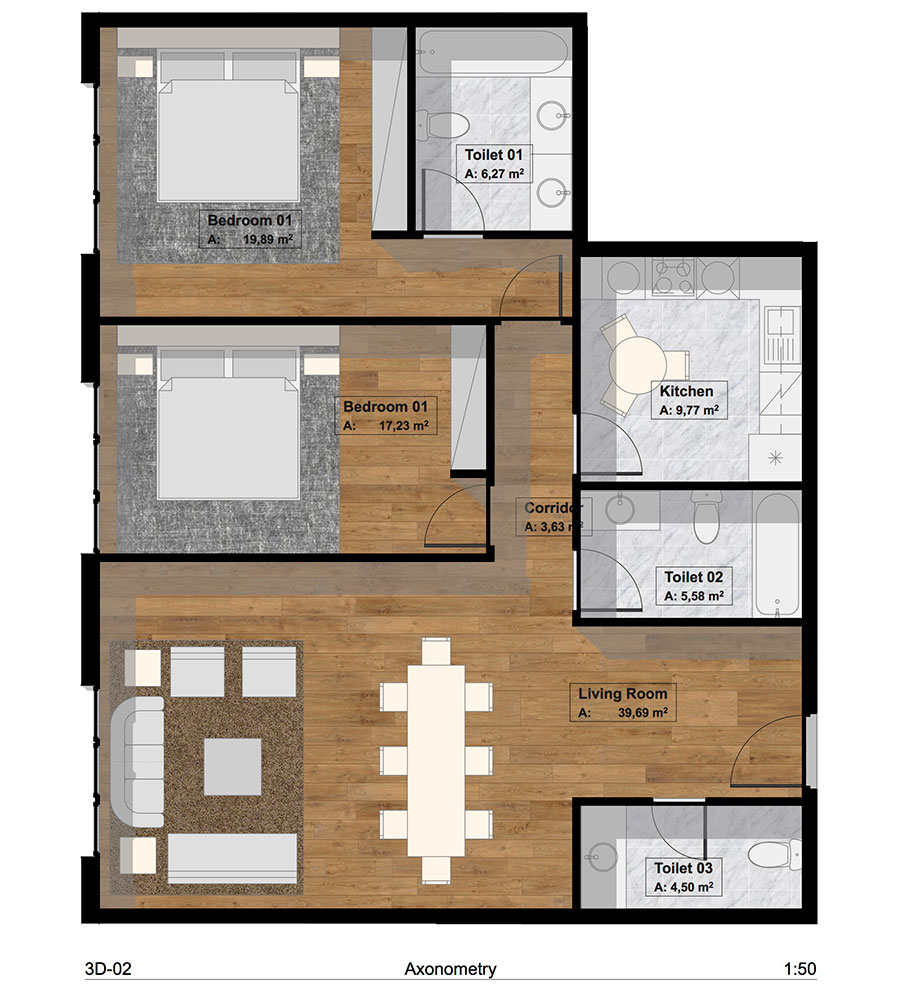
The result of this process is what you see. You can also add Zones to display the name of the spaces with the Square meters that Zones will give you automatically.
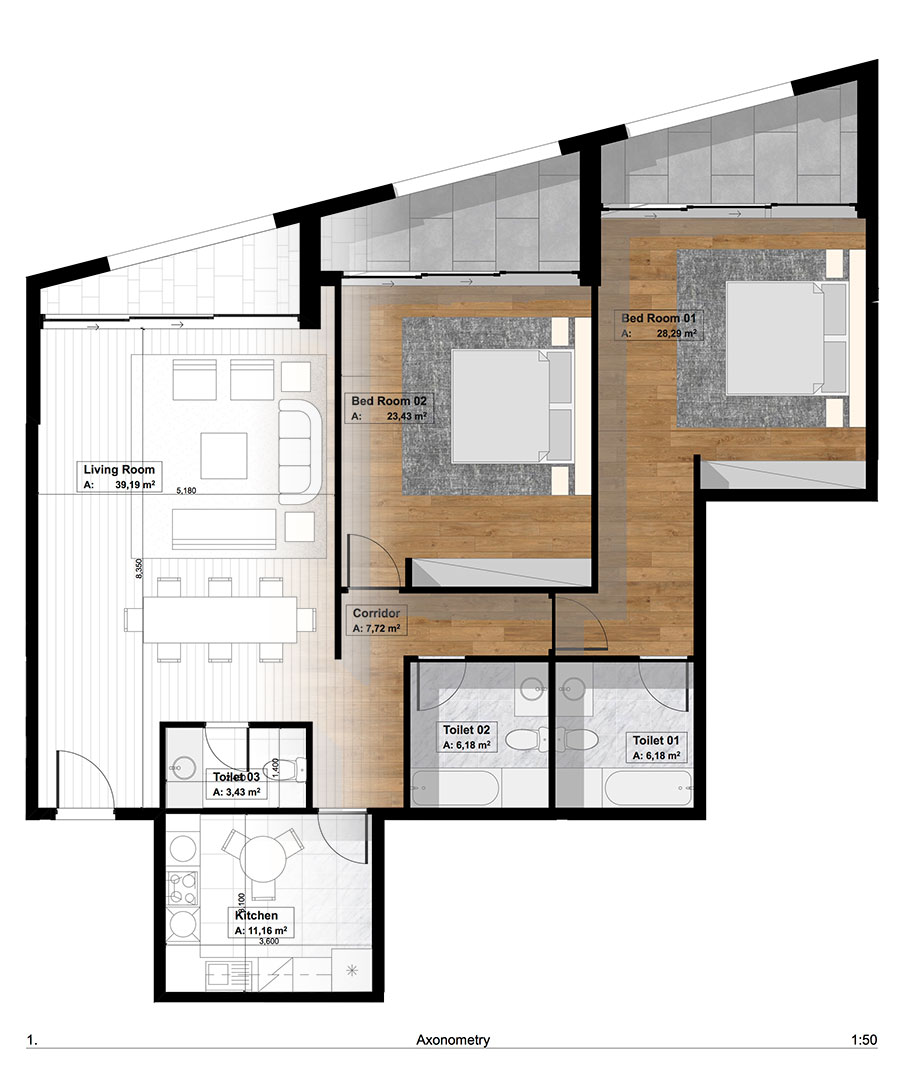
This whole process can be done also with Axonometric views, Sections, Elevations, Details, etc.. Since this is a current alive project we are still improving it and will optimise the process and the result. We are glad to show you this exercise since we are saving a lot of time, believe me. We need to produce around twenty different typologies. Imagine how long could be the process if we also had to do a render of each of them, overlay and scale to the Drawing (with a Jpg is not that precise), and then repeat the process anytime there is a change of material, move a furniture, etc…
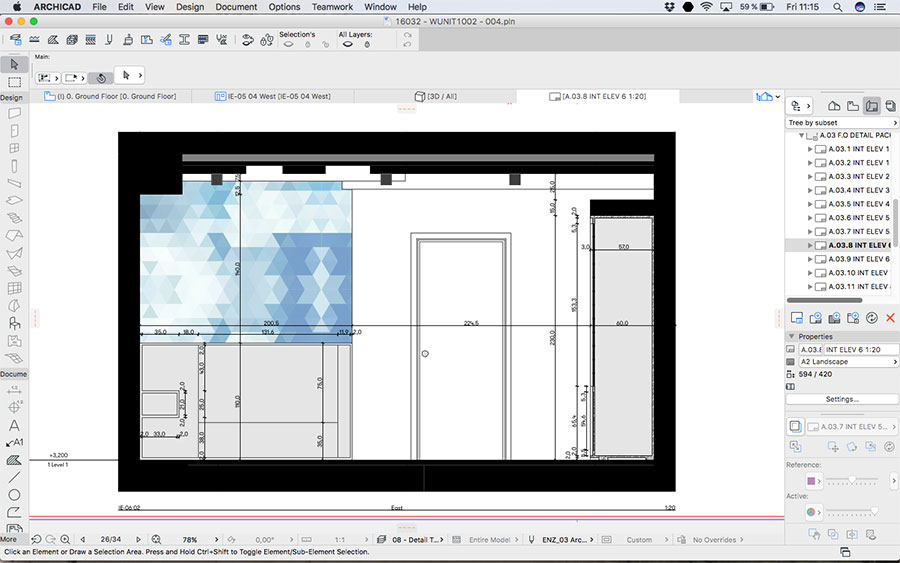
This is another example of a current project we are working on. W also implement this with particular materials in 1:20 and 1:5 Detailed Drawings.
With this process the first one took some time. Once the Fills are created, the Graphic Overrides are Set and the 3D Axo Floorplan is ready, the only thing we need to do is add the furniture into our project and place every Typology in a Layout Page overlapped with the 3D Axo Top view. It takes a few minutes for each typology. The process is automated and we just take care of do the model and improve the project.
If you have any doubt of how to achieve any of the steps related before please go to the help center from Graphisoft website. There you will find perfect explanations of every feature. We just want you to understand the whole concept and the workflow. Every step will make you learn very powerful possibilities of ARCHICAD.
It is common practice for architects to produce this kind of “Visual – Floor Plans”. Doesn’t mean you need to spend much time on it. Is better to focus on the design, the quality of the space, etc.. And ARCHICAD is just about that.
I hope you found this article useful.
Thank you for read us!

ARCHITECTURAL DOCUMENTATION IN ARCHICAD (PART 3): AUTOMATED RENDERED DRAWINGS
Get our latest posts and projects delivered directly to your inbox!
Processing…
Success! You're on the list.
Whoops! There was an error and we couldn't process your subscription. Please reload the page and try again.